Showing posts with label Asian savory. Show all posts

Sunday, April 13, 2014

Kimchi Stirfry chicken with cabbage

 Hey, I'm back, I know I've been neglecting my blog but life has been kinda hectic of late.

This was inspired after several trips to the Korean restaurant called Dubu Dubu located in Sunway Pyramid. The price was reasonable considering the ambience and location. I told myself I must try out this dish someday soon and that day finally came. The key ingredient is this Korean chili bean paste.

 
I didn't do any goggle research on this recipe prior to trying out because like I said, as long as I have the key ingredient, the taste is not gonna run far. I have however added a few 'concoction' of mine to make this recipe as close as possible to the one I ate in Dubu Dubu.

Here are the additional seasoning and ingredients that I've added :
 
Sesame oil 
Sweet soy sauce 
Dark soy sauce 
Dash of salt 
Chili Flakes 
Water 
Green capsicum 
Cabbage (a must have) 
Korean chili bean paste (a must have) 
Cherry tomatoes 
Garlic and big onions
Dice chicken (of course)
 
I made this for lunch today after my gym class and it's a pity that hubby wasn't around to savor it. The dish came out pretty well suited to my tastebud but of course it wasn't as spectacular as the one I ate in Dubu Dubu. Gonna make this again for dinner tomorrow. Errr...notice my lovely bento box? I deliberately asked cousin Soo to get it for me from Japan just for the sake of photo taking for my blog :D  Thanks couz for the bento! I love it.

Thursday, January 2, 2014

Rice Wine Chicken & Sambal ikan bilis


These 2 recipes may sound odd to be put together but rest assured, they're a dish of its own and....I cooked both tonight without the rice. What's more, we didn't actually have them for dinner while the portion was fit for 4 - 5 pax. Yea..talk about peculiarity.

Mom has left some chicken fillet and ginger in my fridge and if I don't cook it soooner before she comes over next week, my ears may just suffer a little nagging (again)  :) There's this rice wine my mom in law made and when you put all of these ingredients together, you'll get Rice Wine Chicken.

Ingredients for Rice Wine Chicken
Chopped garlic
Shreded ginger (lots)
Chicken meat
Fungus (shred preferred)
Rice Wine (homemade)
Rock sugar cane (tiny lump)
A pinch of salt

Hubby was on a strict diet but he couldn't help peeking into my pot and served himself a small bowl eventhough he had earlier swore that he ain't gonna eat.

Now...I've got another problem. I've got the following ingredients in my fridge :
  • Kaffir lime leaves
  • 2 stalk of lemongrass
  • Chilli boh
  • Tamarind
  • Lots of peeled onions (bought in the market a week ago)
  • 2 big onions

So again, with all of the above ingredients + a packet of ikan bilis which I bought during my last trip to Kuantan, I've decided to cook Sambal Ikan Bilis.....at 10.05pm. Yes.... that's exactly what I did. I reckon I've been a little over ambitious with the tamarind juice, hence a tad too sour. I normally don't use lemongrass or kaffir lime leave when I cook sambal ikan bilis but I gotta get rid of these 2 ingredients otherwise they're gonna end up in the land of dustbin.

The pictures not perfect but oh man.. I'm don't wanna climb up to get his camera.

So, the next question is.....whose gonna eat the Rice Wine Chicken and Sambal Ikan Bilis I just cook at this ungodly hour? My colleagues of course... that'll be my lunch tomorrow and part of their lunch too. 

Thursday, April 18, 2013

Maggi Magic Meals : Ayam Masak Merah


Ayam Masak Merah - just dump the meat in the bag and dump the bag in the rice cooker.


Yes, it's a new product from Maggi which comes in 3 different variants : Aromatic Chicken Curry, Spiced Soya Chicken and SavoryTomato Chicken (Ayam Masak Merah).  Of the 3 variants, what enticed me most was the Ayam Masak Merah though I honestly have not the slightest notion how it could be translated to  "Tomato Chicken" in English. Anyway, I tried it out today and I bet my colleagues are fervently waiting for my feedback.

That's how it looks like right after I've completed the cooking. Yea.. I mentioned rice cooker but I ain't have one at home so I substitute it with my steamer pot instead.
To start off, it is an awfully convenient way of cooking a dish in a rice cooker.  Just throw in the chicken parts into the Maggi cooking bag provided, add in the packet of seasoning, seal the bag and lastly, place the bag on top of the rice and switch on the rice cooker. Once rice is cooked, leave it on at "Warm" mode for another 25 mins. Chicken will be totally cooked and you've just completed a dish while the rice cooker was cooking the rice for you. Now... isn't that convenient especially for people like me who's constantly complaining of 'insufficient time'?
Magic Meals comes in 3 variants.
 I bet you are worried about placing a plastic bag in the rice cooker for health reasons. Well, the bag used was of food grade and tested to be safe and durable under the heat. Apparently, this method of cooking is not new in the market, I was told but it's definitely the first time I've heard of it.
 
Okay now.. my verdict on the taste. While it's no doubt a perfectly convenient way of getting a dish ready to eat, it doesn't have the 'wow' factor when it comes to taste. It's edible nonetheless but to me, it is lacking in the flavor. Perhaps I should try marinating the chicken in the bag for a longer period before throwing it into the rice cooker. This way the taste would probably absorb into the meat to give a more intense and kicking taste. 
Another angle of the Ayam Masak Merah from Maggi Magic Meals

 Although it says just add chicken and onion rings in the bag, I've added some tomatoes in it because it just doesn't do any justice to the name "Savory Tomato Chicken" if I don't add any real tomotoes in. 
 Dont' just rely on my verdict. Go grab a packet of these Magic Meals. It's available now in most major hypermart (except Tesco Paradigmn!). Try it out this fun and convenient way of cooking and let me know of your verdict instead. Have fun!


Saturday, September 1, 2012

Sushi from Scratch


It was my very 1st attempt on sushi making and prior to this, I had my Singapore colleague Jezamine, to scan over the recipes to me. Thanks Jez! I seriously think it doesn't worth all the trouble if I were to prepare sushi for just me and hubby to consume. Afterall, how much can we stuff the sushi loaded with high carb rice into our tummies and how many varieties can we have? Since mom and dad is here to stay with me, I thought it would be great to finally try my hands on sushi making. Let me just put it that japanese dinner can be pretty costly  for the 1st time because the ingredients and sauces do not come cheap. As long as I use up all of them before they expire, I guess money will be well spent then. The fillings I prepared today were cucumber, rish roe, sesame, carrot and pork floss. There were canned tuna and crab stick in the fridge but mom and I decided that the current ingredients should suffice.


I do not want another boring style of sushi with the seaweed on the outer layer. As such, I made with the rice on the outer so that I could coat the rice with the roasted black sesame. What I failed to achieve was rolling it into a square shape. Well, next time I'll try to do better than this.


I enjoy eating inari. We bought the empty tofu skin and made an assortment of filling : stuffed rice with fish roe & sesame  and stuffed rice with pork floss & sesame. Good combination? The sweetness of the tofu skin blends real well with the rice which has been mixed with japanese vinegar.

 
While shopping for the ingredients, hubby saw the raw fish which came with 8 of them in a box. He kept asking me 'this?, ok?" and I knew no matter how vehemently I object to it, he will still place this box of fishes into our shopping cart. He loves the fried fried fish filled with plenty of ..uh.. eggs. Mom coated the fish with our special crispy flour and fried it at high fire towards the end to achieve a tip top crispiness. They all claimed the bone could be swallowed but I ain't taking no chances. I don't even eat unagi, for Christ's sake!
 

So here are the ingredients I used for today sushi making. The roasted sesame dressing is my usual salad dressing besides mayonaise, ceasar and thousand island. The next sushi for dinner will be in Sept as well, I promise.

Tuesday, August 28, 2012

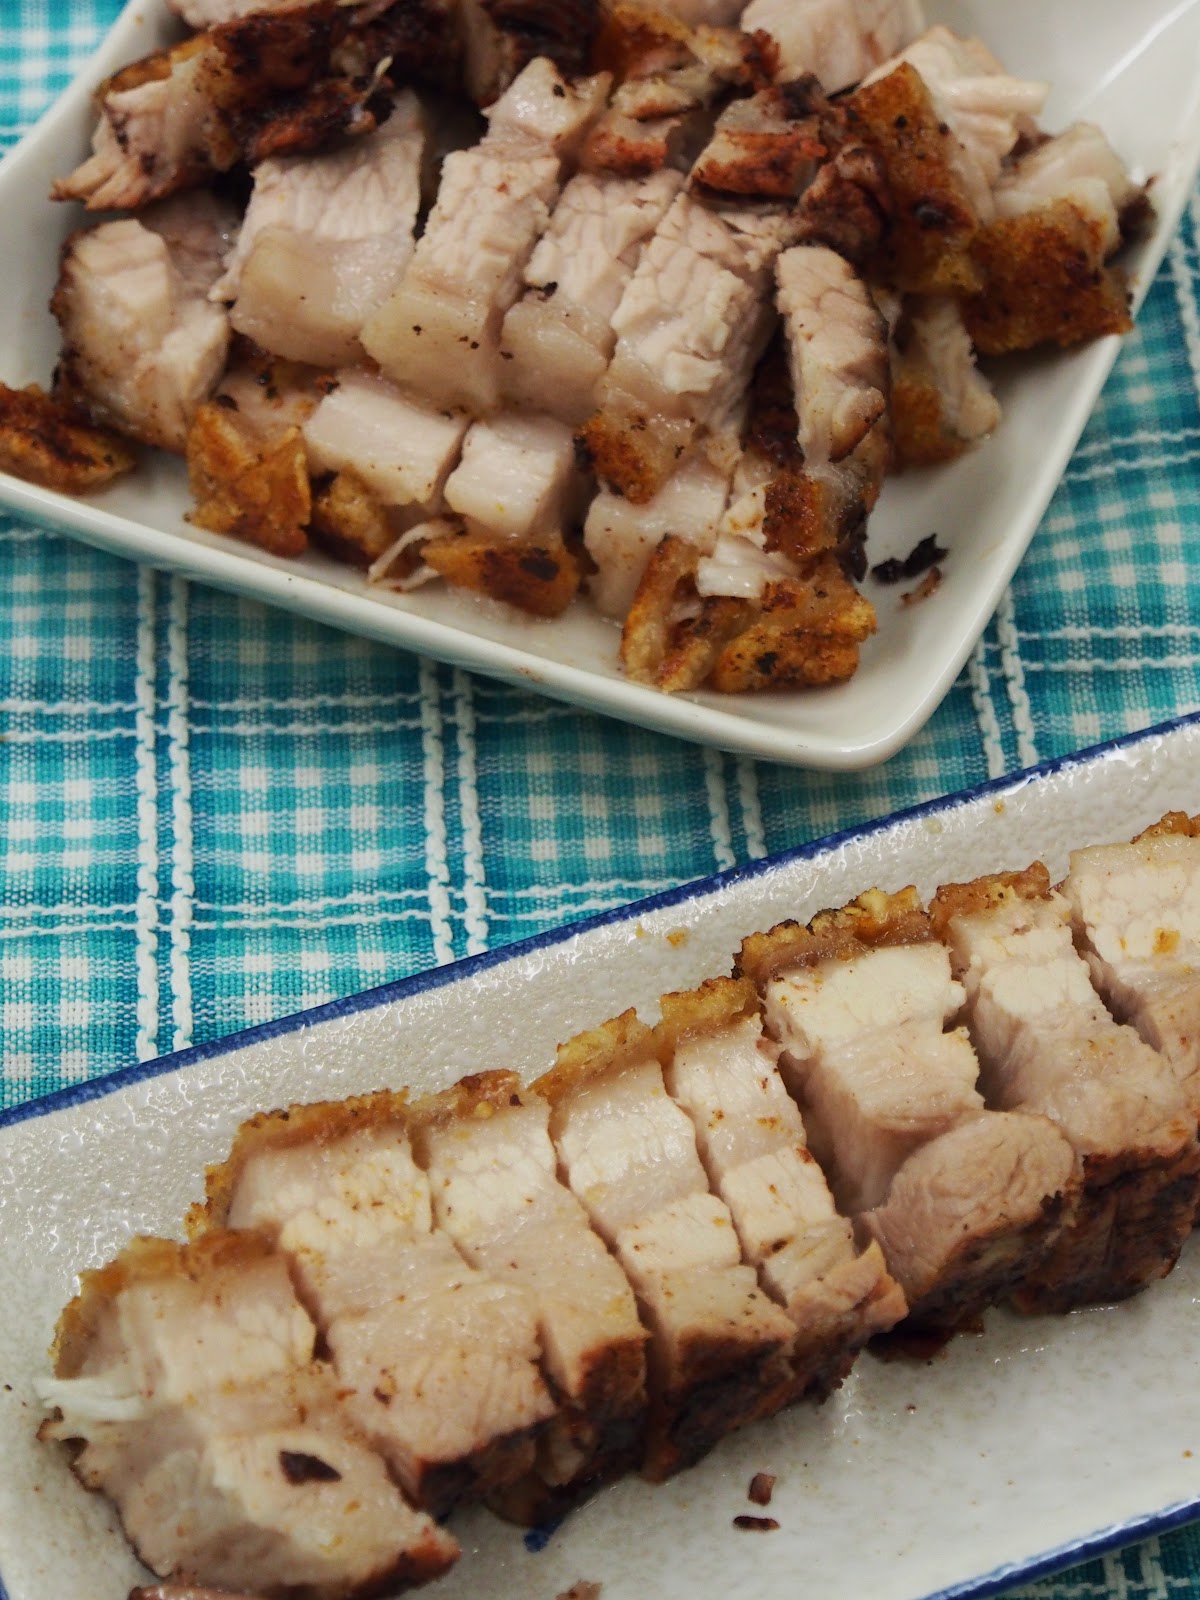
Roasted Pork Belly (again)

 
While I was in Spore during the recent raya, John's FIL bought siew yok for us to eat. He mentioned it was one of the notable stall selling siew yok. Later on, I bragged to dad and mom that I know how to roast one. Dad of course poohed poohed at my remarks and so....I just had to show him and make him eat his words... as well as the roast pork, of course.
 

There were several deafeaning explosions in the oven that made me hover at the side. The pop and cackling sound were just too humongous and frequent but that means the skin will be crispy instead of chewy. I bought the fattest chunk of meat belly I could get because dad will not bat an eye on any meat without a layer of huge fat in it.

 
Dad loves the meat to be cut slightly  think and chunky while me and mom prefer it to be just about 1-1.5cm thick. Dad went oohhing and aahhing when he first tasted the meat and I of course was chuckling at his reaction. I was showered with accolades and he told me I must make this in Singapore for my bro John and his in laws to eat. I told dad to pass that message to my brother  that if he can't wait to eat it, all he needs is to buy me an air tix and I'll fly there to roast one for him. All expenses will be on him then. Afterall, nothing comes free right? Afterall, I'm his little sister, right?

Wednesday, August 15, 2012

Stuffed Bitter Gourd


I was inspired to try this out after having sampling this dish made by hubby's eldest sister. I realized that I missed out a very crucial ingredient when I was halfway frying it because the filling doesn't seem to stick well to the vegetable. The culprilt is  mackerel (ikan tenggiri). We just had to make do without it then. Can you believe I was actually being shooed out of the kitchen by hubby because he insisted that he knew better how to make the sauce than me?  This dish turned out great. We both love bitter gourd and the simple marination of the meat seemed to go well with the vegetable. The sauce... well... what can I say? It was awesome. This dish goes well with white rice or you can even eat it on its own. We ate it with steam white rice topped with a juicy piece of ayam goreng berempah. l'll rate this as an easy and fast dish to whip out. In case you're interested, here's the recipe. Enjoy!

Filling & Marination :
Mackerel fillet
Mince pork
Soy Sauce
Sesame oil
Chop onions
Salt

Sauce :
Bean paste (taucu)
Water
Dash of salt
Sesame oil (optional)
Cornstarch
Sugar

Other Ingredient :
Bitter gourd (of course!!)
Small onions - slice

Method :
  1. Marinate the filling with the sauces mentioned. Set it aside.
  2. Cut bitter gourd to about 1 or 1.5cm thick. Remove seeds and white pulp with a spoon.
  3. Stuff the a generous portion of filling into the centre of bitter gourd. Pat around it.
  4. Heat wok with little oil. Fry the bitter gourd in low fire.When it is cooked, dish out and set aside.
  5. Heat wok with little oil and fry onions in slow fire till slight golden brown. Scoop in sone bean paste, stir it a while before adding water and remaining sauce ingredients except cornstarch.
  6. Bring to simmer. Add in the bitter gourd, stir around and lastly add in the cornstarch.


Saturday, May 19, 2012

Crispy Fried Popiah

I was doing the weekly grocery shopping with mom in hypermart, deliberately led her to the frozen food department and merely showed her the popiah skin. It was like she was suddenly struck with something long forgotten and replied : I know how to make crispy popiah. Her next inevitable question was "do you wanna eat?" I would be a total idiot if I said no but frankly speaking, I'm a fan of anything fried and crispy too. Umm... seems like I'm a fan for a a variety of food.

Mom stir fry the content to be wrapped in the popiah skin : slices of turnip, cabbage, black fungus and bits and pieces of chicken meat cut in small cubes. She said making this finger food is like snapping her fingers ; easy, fast and hey presto, the food is done.

One can't do without sweet Thai chilli sauce when it comes to fried popiah. We dipped generously into the chilli sauce and savoured the taste and the crispy popiah skin. Well, you just gotta eat it while it's still hot and warm, otherwise it will be soft and soggy.

Sigh...another yummy dish to go with our dinner.
Huh?? What?? Recipe?? Later lah. The weather of late is killing me and the new TNB meter is ticking away like nobody's business.

Saturday, September 3, 2011

Chicken BBQ Pau & Red Bean Pau (Steam Buns)


This was done at home, using the same recipe from the class. Smooth filling was not self made.
As I was saying in my previous post, I took a day off to attend a baking class in Damansara Heights. There were numerous class for me to choose from but in the end, I settled on pau making class instead of pastry pro class. I reckon I will never venture to make a puff pastry since frozen ones are easily accessible. As for sweet pastry, I've done that countless times. I made the right decision because I got to learn how to make pau and the filling from scratch. Yes, from deboning the chicken meat to cooking the red bean filling from the red beans. It was very unfortunate that I couldn't eat the very own chicken BBQ pau I made because I'm still on a vegan marathon. Errr.... I tasted the gravy though coz I know I'll never sleep that night without knowing how the BBQ filling taste like. It sure smell wonderful to my nostrils.


Wholemeal Chicken BBQ Pau made in the class.
Okay, I know the pau looked kinda hideous but it was my very 1st time making pleats to the pau instead of just a boring round shape. I gotta perfect this skill and that means more practice. My next pau will be a vegetarian pau. When? Well... soon. Sooner than you thought.

The wholemeal pau. The one behind was yam pau (flour with yam) with red bean filling

Yes, unsightly pleated but hey this is just the beginning. It's my 2nd attempt anyway

As per request from a friend, here's the recipe.

Ingredients for pau :
1 tsp instant yeast
1/2 cup lukewarm water
1 tbsp sugar
3/4 plain flour
3/4 wholemeal flour
1 tsp cooking oil
1 tsp double action baking powder (I omitted this entirely)

Ingredients for filling :
300g chicken pieces, skinless, boneless, cut cubes, marinated in 1/4 tsp of salt and pepper
3/4 cup green peas
1 onion, chopped
2 cloves garlic, chopped
1 tbsp cooking oil
1 tbsp hoisin sauce
1 tbsp oyster sauce
1 tsp sesame oil
1 tsp cornflour

Method : Pau
  1. Mix instant yeast, sugar and warm water and let it stand for 5 mins.
  2. Mix all the ingredients together and knead the dough for about 15 mins until it forms an elastic ball.
  3. Cover with damp cloth and let it rest for about 30 mins

Method : Filling
  1. Heat up oil and fry the garlic and onion.
  2. Add in chopped onions, peas and chicken cubes.
  3. Add in the hoisin sauce, oyster sauce and sesame oil.
  4. Mix cornflour with a little water and thicken the filling.
Method : Wrapping filling in pau
  1. Divide dough to about 8 portions. If you prefer pau to be smaller, divide to 10 or 12 portions. Roll them into balls.
  2. Flatten each dough and make the edges thinner.
  3. Scoop a spoon full of filling into the centre and pleat to seal.
  4. Place pau on a piece of greaseproof paper. Repeat for remaining dough.
  5. Cover the pau with damp cloth and leave it to rest for 45 mins.
  6. Steam over high heat for 15 mins. Serve hot.

My cooking tips : The double action baking powder serves to proof the dough faster. To ensure dough is well knead for proofing, pull the dough. If it's quite elastic and doesn't break so easily, then dough is well knead.


My team mates in the class. Starting to make the pau shape.
 
Kneading the dough for proofing later on.

Thursday, July 21, 2011

Pan Grilled Mackerel in Banana Leaf


Recently I had the chance to get acquainted with Chef Muluk during an event. Over dinner we made small little chat and needless to say, our topic was about food and cooking. When I asked him for little tips to whip up fast meals, he generously shared some valuable tips with me without reservation. One such recipe is to bake or pan grill mackerel (or any fish). Ideally, I would have marinated the fish with a little salt and a packet of instant tomyam paste. Unfortunately, I was forced to discard my one and only tomyam paste simply because it has expired. What a shame. Anyway, all's good coz I got to follow the marinates given by Chef.
It was just :
  • salt,
  • a teeny weeny bit of tumeric powder, 
  • a little chilli powder (my own idea),
  • pieces of sliced tamarind (I had those wet type and so I mixed a little water with it and rub on the fish)
  • slice onions

I didn't marinate it for long before I wrapped it nicely with a big piece of banana leaf and then with the aluminium foil. I removed the foil after I pan grilled for approximately 8 mins because it seems like I was taking forever to get the fish cook. You see, I was running a little late for dinner. Frankly speaking, I prefer my fish to be fried because I love fried stuffs. A little unhealthy but yeah, I still prefer that way. Perhaps the fish would be properly infused with the aroma of banana leaf had I not removed the foil. But then again, hubby and I had a feast of banana leaf rice with pan grilled fish in banana leaf and of course, with 2 other dishes. Hubby was happy that he has 2 less plates to wash. He was more than happy. He was elated.


Wednesday, July 6, 2011

Cucur Udang (Prawn Fritters)


Since mom arrived,  I've taken a back seat and I'm doing this with utmost willingness. She really has this unwavering passion in cooking, trying out new dishes but deep down, I know she just wanna whip up some great food for us to enjoy. This is her very 1st attempt on cucur udang, a recipe she found in my bilingual recipe book. We bought a lot of prawns during our last trip to Kuala Selangor and she casually asked me whether I'll be interested to eat cucur udang. Though it was her 1st trial, the cucur udang came out marvellous. She was generous with the prawns, onions and chili. It was full of real stuff rather than just flour. To eat this, I had to deliberately ride my bike out to the nearest shop to get a bottle of Thai chili. The recipe is adapted from Agnes Chang. After going through the entire recipe, mom said she feels some modification is needed (aisheeh man!)


Ingredients A:
300g plain flour, sifted with 21/2 tsp baking powder
3 eggs
250ml water (1 cup)

Ingredients B:
3 tbsp dried prawns, soaked and pounded
120g prawn meat, diced
3 red chillies, chopped
3 green chillies, chopped
2 stalks spring onion, chopped
2 big onions, chopped
1 tsp salt or to taste


Method:
  1. Mix A in one direction until a smooth batter is formed.
  2. Add B and mix until well combined. Taste it.
  3. Heat up oil, spoon mixture into hot oil and deep dry with medium heat until golden brown and cooked. Dish and drain.
  4. Serve hot as a snack with Thai Chilli sauce.

Monday, June 27, 2011

Steamed Vegetable Dumplings (Chai Kueh aka Soon Kuay)


When I was back in Singapore in March 2011, mom and John's MIL collaborated to make Soon Kuay. I gave a whoop of joy when  I saw what the 2 elderly women was toiling about in the pretty messy kitchen. One was frying the filling in the wok while the other was using all her might to make the skin and later on, wrapped it nicely using the Soon Kuay mould. When the steaming tray came out, I couldn't wait to sink my teeth in it and boy, the taste was super fantastic while the skin was absolutely soft , thin and silky. I couldn't forget the taste  many days after that.


Mom actually bought 2 packets of the Soon Kuay flour and brought it over to KL. I helped her with the frying and wrapping. I still need to practise a little on how to knead the Soon Kuay flour. She bought the Soon Kuay flour in Singapore under the brand name Sunflower. The flour is a premix of rice flour, tapioca flour, wheat flour and corn flour. If this premix is not accessible to you, you'll need to find out the exact measurement on how to make it. It's of course easier to use the premix. It is best eaten with a little sweet sauce (甜酱)  and chilli sauce.


Soon Kuay Flour premix. Brand : Sunflower

 Here's the recipe that has mom generously shared :

Ingredients :
2 mid size turnip (about 1kg)
1 tbsp dried shrimp - coarsely minced
300g thinly sliced pork (with a little fat in it)
8 small onions - thinly sliced
1 tsp cornflour - add with a little water
light soy sauce
oyster sauce
dash of salt
dash of sugar
dash of pepper
1 packet of Soon Kueh Flour (brand is Sunflower bought in Singapore)


Filling method :
  1. Heat up oil, fry shallots till fragrant in low heat. Before it starts to turn color, add in dried shrimp. Turn on low heat.
  2. When color changes to slight brown, add in sliced pork. Saute till meat is cook. Add in oyster sauce before adding in turnip. Saute and add in a little water.
  3. Add in soy sauce, sugar, pepper and salt. Please taste it before you continue adding more of the sauces to suit your preference. If it gets drier, add in water little by little. Saute till turnips are soft. Taste it for one last time to decide whether you need to add in more of the sauces.
  4. The mould to make Soon Kuay
  5. Add in cornflour and stir before dishing out. Set it aside to cool while you work on the dumpling skin.

Dumpling skin method:
  1. Pour 500ml of water into a pot, bring to boil. Add 260gm of Soon Kuah flour into the briskly boiling water. Turn fire off immediately. Add one soup spoonful of cooking oil into it, use a pair of chopstick or wooden saucepan to stir well, use palm to blend it hard until it forms into a smooth and elastic dough.
  2. Divide dough into several portions and flatten into Kuay Sheet, wrap Kuay Sheet with prepared fillings.
Steaming Method :
  1. Ensure steaming tray is fully "oiled" before placing the Soon Kuay on it to steam.
  2. Steam for about 10 - 13 minutes, remove tray from steaming pot and glaze it with a little vegetable oil on top. Serve immediately with sweet sauce and chilli sauce

Thursday, June 23, 2011

Fried Vermicelli (in white) (炒米粉)

A little bored with rice for dinner, mom told me she wanted to fry bihun for us for dinner but it will be 'white' in color instead of the usual dark type. I couldn't agree more to her suggestion. Everything she whips up seems to be 'effortless'. I gotta hand it to her because everything she claims to be simple and easy. For the past few weeks, I've been blessed with delectable homecooked dinner. With the simplest ingredients, she fried this delicious vermicelli with refreshing taste : minus the taste of dark soy sauce. Since I cannot do without any spicy note, I sprinkled some course chilli pepper on top.

Ingredients :
bai chai
carrots shreded
mushroom (soaked) - slice
pork - slice
fish cake - slice
spring onion
small onions - thinly sliced
garlic - thinly sliced

Seasoning :
chicken powder
oyster sauce
light soy sauce
salt
pepper
water


Method :
  1. Soaked vermicelli for 30 minutes, drain and set aside. Mix all the seasonings with water and set aside.
  2. Heat oil to saute small onions and garlic till aromtic or light brown.  Add in the  mushrooms and stirfry  for about 2 mins before adding in the sliced meat.
  3. Once the meat turned color (meaning cooked), add in fishcake to fry for 2 - 3 minutes before adding in the vegetables.
  4. Stir in the vermicelli and add in the seasonings.  Continue to fry for another 3 - 5 minutes or until vermicelli turn soft. Turn off fire and garnish with spring onions and/or cut red chillis.
My cooking note : You may wish to substitute pork with chicken slice or beef strips or any other seafood.

Thursday, June 16, 2011

Steamed Silky Eggs


Lately, the weather is back to the usual sweltering heat. Mom was saying it'll be a nice change to have congee to go with some simple dishes for dinner. With mom around for the past 2 weeks, she has fed me and hubby with lots of super yummy food but the best of all is, there's food on the table when we got home from work :) Since it's congee, I told mom I'll make the Steamed Silky Eggs. It's fast and it's as simple as ABC. I've never tried this recipe before but it has been there in one of my recipe book for a long time. It turned out perfectly soft and silky as promised by the title. The trick is the heat and of course, the proportion of water added to the eggs. A swift way to know exactly how much water you should add (if you have more than 3 egss or the size of your eggs varies ) is to measure the portion of the beaten eggs. How much eggs it is, how much water you should add in. I should've scoop a portion of the egg to show how silky and smooth the eggs are. By the time I remembered, the eggs were almost gone from the tray.

Ingredients :
300ml water
3 eggs

Seasoning :
1/2 tsp salt
dash of pepper
dash of chicken stock granules/ powder
1 thsp chopped spring onion
1 thsp gried garlic oil
1 tsp light soya sauce

Method :
  1. Combine water, eggs, seasoning, and mix well. Strain into a steaming tray
  2. Steam at low heat 10 minutes or until set. Remove.
  3. Sprinkle choped spring onion, fried garlic oil, light soya sauce on egg and serve.
My cooking tips : Lightly beat the eggs to avoid too much air from getting in. This is to ensure the surface is smooth and nice. Do not steam the eggs with high heat, otherwise the texture will be course and not smooth.

Wednesday, March 23, 2011

Chai Tau Kueh II (Fried Carrot Cake)

During mom's recent stay at my place, she made quite a number of delicacies. One of them was my all time favorite Chai Tau Kueh. We actually bought radish and the rice flour and mom made the carrot cake from scratch. For the first time, she used my i-chef steamer pot to steam the cake and thereafter, she gave 2 thumbs up for this pot of mine. Money well spent, I supposed. I tried getting the recipe from mom but unfortunately for her, everything is 'agak-agak' (estimate). She bought a medium size radish and that should go with 1 packet of rice flour. The previous rounds that she made in KL, we all detected a weird note and that weird taste actually came from the four. It seems that any kueh that is made with rice flour tends to have this strange taste. So this time, we bought the rice flour in Singapore and true enough, the weird awful smell did not appear in our carrot cake. Mom fried it the way I like it too : crips at all sides and cake is not largely cut.

Sunday, January 23, 2011

Fried Eggs with Shredded big onions & Spring Onions

For the past few days, we've been busy with spring cleaning of the house in anticipation of chinese new year. It seems like only several months ago that we scrambled to do exactly the same thing while at the same time I was also rushing and filling every spare time I have to bake the cookies for sale. It also just occured to me that our blog is already 1 year old. With so many things on hand and so much on my mind,  I told hubby apart from the fruits,  I'm just gonna fry a simple egg to go with our creamy shrimp tom yum instant noodles. He looked at my blankly and I told him okaaay... this egg will be loaded with strips of big onions, spring onions , some cut chilli and this is something my mom used to make as one of the dish in Batu Pahat. Hubby mumbled an 'ok' but I think he knows deep down that whether it is ok or not, I will still go ahead and fry it.

The eggs were whisked with soy sauce, pinch of pepper, dash of salt, some chilli flakes and little mushroom powder. When the olive oil was hot, I threw in the big onions and sauteed for a while before pouring the whisked egg. Just before the egg was cooked, I took a handful of chopped spring onions and sprinkled them on top of the egg. When the bottom of the egg was done, I flipped to the other side and cooked it till done. All in all, it took less than 5 minutes and our frugal simple dinner was done.