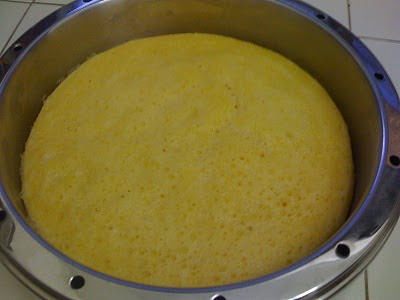
I came across this steamed sweet creamy corn recipe by chance. Previously I've tried my hands on steaming recipe before but it turned out rock hard. This time however, I have my i-chef steamer pot with me which somehow makes me even more eager to get it done. Did this cake in a jiffy on a late Sunday evening and I was relieved it turned out soft, moist and not too dense. The preparation method was easier than the usual recipes as I do not need to beat the butter. Anyway , I wouldn't have second thoughts to steam this cake again. Hubby as usual didn't eat much as he doesn't have a sweet tooth. I poured some batter into mini cups just for fun. Oh yea...the picture's quality is out, I know coz I was the photograher :D
Wednesday, August 25, 2010
Tuesday, August 24, 2010
Steamed Sourish Slice Garoupa
I love this picture as much as I love eating this dish. It was the last miserable piece of garoupa in my freezer and I wanted to steam it with sour plum. I looked through every nook and corner of my fridge but just couldn't find the bottle of plum which I thought I saw it somewhere before. Anyway, I found a 2nd best substitute for the plum ; yes it's tomatoes. I only have this cherry round tomatoes bought mainly for my salad but then as it turned out, it kinda look great here in the pix with the added bright color. When you steam fish, you will not fall short of ginger and parsley for garnishing. But for this dish here, the sourish taste oozing out from the tomato makes it slightly different from other fish that I've steamed previously. This dish was just lovely for the 2 of us.
Sunday, August 22, 2010
Black Glutinous Rice & Black Sesame Paste
I guess I didn't tell you about the bean paste maker I bought from i-chef. Yea.. bought that one day earlier than the steamer pot. I had wanted to make my own soya bean drink for a long long time and while looking for a steamer pot, I was introduced to this bean paste maker which is able to make soya bean and paste dessert. The best part is this maker not only blends the ingredients in it, it helps to boil them as well. The whole idea of this machine is to make one's life easier. So with this recipe, I soaked all the ingredients a day earlier : black glutionous rice, black sesame, a little white sesame and buckwheat. The following morning, I strained all the ingredients, poured them into the machine, fill up the water to the indicated level and pushed the start button. While the machine was doing its job of boiling, blending and cooking, I showered, brushed my teeth, did my face and changed to my working clothes. When I came down about 25 mins later, hey presto, the paste was done and that was my breakfast in office. Marvellous.
Thursday, August 19, 2010
Basic DSLR Photography (Part II): Metering
Most articles in this blog were written by my wife and I just managed to write 3 articles to date. I am a very talkative person but a bad writer; just can’t translate what's in my mind into writing. Today however, I happen to read two comments, one each in two of my photography articles. I am delighted to know that someone out there, somewhere and somehow found my articles enlightening and helpful, so this further motivates me to embark on the Part II of my Basic DSLR Photography. Here we go…
We now have some understanding on the Exposure Triangle; knowing what is ISO, Shutter Speed and Aperture and how important they relate to photography. So what's next?
METERING
Nothing is more important than the brain behind your DSLR camera, the Metering. Metering is the way your DSLR camera determines exposure or how it measures light. It will tell you what is the correct exposure (but not always the ideal one) for a scene you want to capture by giving a set of exposure combination ie. shutter speed and aperture based on a preset ISO speed.
Most of the DSLR camera today is equip with at least 3 metering options namely matrix, center-weighted and spot metering which varies in performance and accuracy under different light condition. Different camera manufacturer have different terms and symbols but generally they all work the same. Since I am a NIKON user, I will explain using NIKON terms and symbols so, non Nikonians, please pardon me ya…
Matrix Metering
This is the default DSLR camera’s metering setting, most commonly used and recommended in most situations. How matrix metering works is by dividing the scene you capture into multiple zones, analyze each zone and evaluate by comparing these data with a database of thousands of pictures inside DSLR camera for exposure calculation. I set my DSLR camera metering to matrix most of the time and use mostly when I do my landscape photography. For a beginner, lock on to this metering option and you won’t go wrong until the day you find yourself in some tricky and high contrast lighting situations.
Centre-Weighted
As indicated by its name center-weighted, this metering option concentrate towards the centre part of the scene, ignoring the corner. It is handy in high contrast, back light scene and classic for portrait photography. Use this metering option when your subject is relatively large and dominates the middle part of the frame. For example, if you want to portrait a beautiful fair complexion model with the sun behind her, this metering option lets you correctly expose the middle headshot. If you use matrix metering in this situation, most probably your fair complexion model will have a charcoal face due to underexpose and she will definitely bash you up for this!!
Spot Metering
At the beginning, I too was confused on the difference between center-weighted and spot metering and I think it was largely due to the misleading symbols. Both work similarly but for spot metering it measures only a very small area of the frame (about 1%-5% of the viewfinder, according to WIKIPEDIA) and evaluates the exposure surrounding your focus point only. I repeat… surrounding your focus point only. So that means it measures the exposure wherever your focus point is and is not limited in the center of frame like center-weighted metering. It is very useful for those camera like NIKON D300s with 51 focus points but not with NIKON D60 with just only 3 focus point. No wonder I couldn't understand when I was using my D60 at that time until I obtained my D300s.
Having written this much , it's about time to put our theory into practice. So what are you waiting for? Grab your DSLR camera and get out to capture some light!
Wednesday, August 18, 2010
Kung Po Chicken (Kung Pou Kai Ting)
We recently organized a few workshops for our clients and there were a lot of leftover chicken fillet. And so, I was the priviledged one to be given the fillet coz my colleague knows I cook every now and then. At such a short notice, I had to rake my mind quickly on what I could cook with the chicken fillet. It was at the spur of moment that my colleague blurted out Kung Po Chicken dish to me and I immediately said 'aha....'. I defrosted the fillet in office, left office on the dot and found hubby sitting comfortably in the living room with eyes glued to the laptop and his index finger busily pushing down the middle button on the mouse. I announced that I'm gonna cook this dish for dinner tonight and while I was busy cutting the fillet into cubes, hubby emerged behind me and said he will take over this dish. Okaaay.... so the boss wanna cook. Great. It's a good thing I have some dried chili in my fridge. In fact, I had almost all the needed ingredients in my fridge and larder but the capsicum had kinda shrivelled and shrunk . Well.. so.. this dish was done by hubby and I gave him 2 thumbs up. I hate to say this but it tasted really good, no joke.
If recipe is needed, I'll post it.
Monday, August 16, 2010
Steamed Silky Tofu with Crispy Dried Shrimp
Here's another easy dish done in just 5 mins using my recently purchased i-chef steamer pot. I just need to fry some dried shrimps over slow fire, dish it out and set aside. For the gravy part, I could just pour some soy sauce over the tofu but this time, I've decided against it. Instead, I pour a teaspoon of oyster sauce mixed with abalone sauce, add a little hot water and a little soy sauce and stir it. After the tofu is done, gravy was poured on top, then top it up with the dried shrimps, fried shallots + oil, corriander and spring onion (which I didn't have in my fridge) and.. it's done. See...it's even simpler than your ABC soup.
Thursday, August 12, 2010
Basic DSLR Photography (Part I): Exposure Triangle
When I spoke to a good friend of mine recently who had just purchased a DSLR, I found out that lot of people have a wrong perception towards DSLR. Most of the people will think that with DSLR, they are able to capture better and sharper photos compare to compact camera.
Well, that can be a right or wrong kind of thing. Of course with better quality optical lens and larger image sensor, DSLR is able to produce good quality & sharper photos but is not always true. We must first understand the basic of photography before we can actually produce better and sharper photos. So what is the basic?
Photography is all about light; if there is no light, there will be no photography and here, we are talking about exposure. Just remember the Exposure Triangle and I call it the Golden Triangle of Photography, which consists of three elements ie. ISO, Shutter Speed and Aperture.
By bringing all these three elements together, we will have an exposure combination. Changing in any one of these elements in the combination will result in either increase or decrease the remaining two. Sounds confusing or rather complicated right? Try to understand the following definition and it will help you to understand what I’ve just said.
ISO
ISO, pronouced as “I-S-O” not “I-So” is the sensitivity of your DSLR image sensor to light. ISO is measured in numbers that is 100, 200, 400… 1600, etc. It simply means that ISO 200 is twice as sensitive as compare to ISO 100 and so on and so forth. Lower ISO will produce finer or smoother grain in photograph and higher ISO will increase noise in your photo. Just remember to always keep to the lowest number as possible in your photo shooting so that you can produce a finer and noise free photo.
Shutter Speed
Shutter Speed which measures in second (s), for example 30s, 15s, 10s, 5s, 1s, 1/10s, 1/60s… 1/4000s, is the amount of time your camera shutter is open and determine the length of time your DSLR image sensor exposed to light. Remember in most cases, use shutter speed faster than 1/60s to avoid camera shake that produce blur photo. It is very difficult for a beginner to handheld and shoot below 1/60s without tripod. I personally can only handle up to 1/30s (moreover with the aid of VR, the vibration reduction from NIKON) so prepare to use tripod if you want to use shutter speed lower than that. Yes, I know it is troublesome but isn’t taking sharp photo is what you want?
Aperture
Aperture is the size of opening in the lens and it is measured in ‘f-stop’, for example f/1.8, f/2, f/2.8, f/4, f/5.6, f/8… f/22, etc. Beginner always confused this f number and the tricky part is they are opposite; the smaller the f number, the bigger the size of opening in the lens and vice versa. Why it is so? Just because f number is a fraction, let’s refresh back to some basic mathematic formula and calculation:
The f number, N and is given by
where f is the focal length and D is the diameter of the lens opening.
Get it? Yes? No? Who cares? Me ain’t no mathematician and since we are talking about photography here, let’s just forget the formula. Instead, memorize this… the smaller the f number, the bigger the lens opening and it allows more light enter through the lens; the bigger the f number, the smaller the lens opening and it allows less light enter through the lens. Wonderfully simple right?
Having written this much, I came to a realization that there are plenty of basic DSLR photography I wanna talk about. Hence, I think I’ll break it into few parts. Hope you all enjoy my post and till then!
Tuesday, August 10, 2010
Pan Fried Garoupa with Dill and Lemon
In order to get rid of the dill which is fast withering in my fridge, I opt to do a pan fried fish. It would be a better option to do it a fillet style, using either halibut or rainbow trout. However the only fish I have in my fridge is slice garoupa and pomfret. A waste to pan fry my garoupa but well, I gotta do with what I have. If given a choice, I will always opt for pan fry than steam. So if I pan fry, I will usually season the fish and fry it straight away. Of course another option for western style of frying would be to coat it with breadcrumbs or flour. So if you wanna add on your calories, be my guest and coat it with flour. Hubby wasn't too eager with this style as he is a typical china man who prefers the fish to be steamed or do it the asian way with curry or assam or tomyam. Anyway, here's the recipe I used :
Ingredients : Fish fillet (of course I used garoupa here)
Salt
Blackpepper coarse ground
Ground Chili powder (I forgot to add in)
Garlic powder
Lemon
Fresh dill
Method :
1. Season fish with salt , garlic powder and pepper. Pat dry
2. Heat oil, turn to low fire and pan fry fish till slight brown or for 3 - 4 mins. Then flip side.
3. Squeeze in a little lemon juice on top, sprinkle some dill and chili pepper.
4. After 3 - 4 mins, flip side again and repeat step 3.
Turn off fire and garnish fish with remaining fresh dill and squeeze a little lemon juice. You may want to steam some veggies to go together with the fish. That's what I did here.
Saturday, August 7, 2010
Stirfry Brocolli in Abalone sauce
The first and foremoset reason why I like cooking brocolli over other leafy green vegetables is not because of its compound that fights against cancer. Rather it is because I don't need to waste too much time washing and rinsing it; there's just not much sand to rinse off anyway. Frying vegetable is the simplest tasks of all. All I need to do is heat the fire, throw in the garlic and fry till fragant, add in the brocolli. After a while, I add in the carrot. Of course exactly when to add in the carrot depends on how thick you have cut your carrot. Then comes the abalone sauce and oyster sauce. I have Lee Kum Kee Abalone sauce in the fridge where you can actually see strands of abalone in the bottle.After dishing it out, garnish with some golden garlic crisps. That's one simple dish the other night and we ate it without rice. Yea.. we did away with the carbohydrate.
Tuesday, August 3, 2010
Steamed White Snapper in Ginger Paste
I suppose the first thing you notice is how badly this picture was taken. Yes, you are right. It was taken by me, via my handphone and that's the best shot my mobile can produce. We bought this fresh fish from Kuala Selangor (yes, we practically drove all the way there to get the fish and then drove back to KL) on a Saturday and hubby took over the cooking of this fish on Sunday. He wanted to steam the fish with lots and lots of pounded ginger. The dish would have been a lot simpler if only I have a blender to blend the ginger into a fine paste. In view of this, I tried to persuade the chef to select another way of steaming the fish but apparently the chef is a very obstinate man and refused to budge. And so there I slouched, with sweat streaming down my face while my hands pounded furiously on the ginger. The fish was done pretty well and of course, the credit goes to the chef while me the assistant, received not even a mere nod of acknowledgement. I did the exaggerated garnishing but hey, isn't corriander a powerful herb which has many health benefits and medicinal properties?
Monday, August 2, 2010
Fresh herbs. Anyone??
Look, what a spread of assorted fresh herbs I have here. They were just given to me just hours ago and my brain was already spinning and working busily to figure what dish I could cook with them. Let's see... I've got Dill and I'll probably panfry it lightly over fire with a nice fish fillet, just like the way I reckon Jamie Oliver will do it. I intend to roast a chicken again with Thyme and Rosemarry. As for the corriander, I could use it to steam another fish, probably tomorrow. Hubby still has got his huge fish head in the freezer and probably he could use the Kaffir Lime Leaf to cook an Assam Fish Head. So, I'm left with Peppermint, Marjoram and Oregano. Does anyone has any suggestions how I should use them? Or maybe provide some ideas how I should used the other herbs which I have planned earlier on? C'mon... I need ideas. Anyone??
Subscribe to:
Posts (Atom)